


ALL Images in this post are from House of Many Hues

 (dated December 2011)
 2.
Retrace a second line about 1 inch away from
your hand line trace. This second line is your sewing line.
2.
Retrace a second line about 1 inch away from
your hand line trace. This second line is your sewing line. 
 * Unless otherwise
noted, all seams are a ¼ inch allowance.
* Unless otherwise
noted, all seams are a ¼ inch allowance. 10. Open both mittens flat, and finger-press the
seam open.
10. Open both mittens flat, and finger-press the
seam open. OPTION: Elastic wrist
 You can find all these tutorials and other great articles in Homegrown, Parenting in the North (FACEBOOK, WEB, ISSUE).
 |
| My take on the Spin-Around Dress. |
 |
| Top to Bottom: Unknown print, Michael Miller Gerberalicious, Kona Solid Black |
 |
| Spin-Around Dress comes in 2T only. |
 |
| Ensure that the print options are at scaling: none. |
 |
| Ensure your pieces are ironed before cutting. This will make your entire project easier to handle. |
 |
| Sew the neck hole, Topstitch then focus on the armholes. Trying to top-stitch the neck afterward will frustrate you. |
 |
| I serged the bottom to prep it for the trim. You can also just achieve this by creating a zig-zag stitch. |
 |
| I shortened the bottom by 4 inches. |
 |
| After much thought, I used an Extra-Wide Double Bias Tape. |
 (dated November 2011)
PREPARATION TIME
Approximately 1 hour
WHAT YOU NEED
CUTTING YOUR MATERIAL
* Unless otherwise noted, all seams are a ¼ inch allowance.


 down the edges at ⅛ inch, and come across the bottom and then finally up the right side. Leave the top unstitched and remember to back stitch at the beginning and the end.
STUFFING THE PILLOW

FINISHING TOUCHES

 Note: You can also alter this design by folding over a ribbon to create a loop and stitch the raw ends into the hole using your sewing machine and top stitching it closed. You can find all these tutorials and other great articles in Homegrown, Parenting in the North (FACEBOOK, WEB, ISSUE).
 (dated October 2011)
PREPARATION TIME
Approximately 2 hours and 15 minutes
WHAT YOU NEED
CUTTING YOUR MATERIAL
ASSEMBLING the EXTERIOR of the BAG
* Unless otherwise noted, all seams are a ¼ inch allowance.
1. Sew around the sides and bottom of the exterior print. Backstitch at both ends. (Note: Zigzag stitch both seam flaps if you want durability.)
2. Press side seams open.
CREATING BOX CORNERS
3. Measure 2 inches by 2 inches on the bottom corners of your bag. Mark a dot at the point where the measurements intersect. Do this on both sides of the bottom of the bag. This should leave you with 4 dots.
4. Put your hand in the bag at the corner and pinch the side and bottom seams together.
5. Line up your side and bottom seam into a triangle.
6. Pin at 2 inches from the corner.
7. Stitch a straight line. Backstitch at both ends.
8. Trim the excess.
9. Repeat this process on the other corner of the bag.
ASSEMBLING the LINING
 10. Repeat Steps 1-2 with ONE EXCEPTION. When sewing around the sides, leave a 5 inch opening at the bottom to allow you to turn your bag inside out after sewing the bag and lining together.
11. Repeat the Box Corners (Steps 3-9) for the Lining.
BAG ASSEMBLY
12. Turn the lining inside out and stuff into your print bag.
(The print bag should still be wrong side out.)
The right sides of the fabrics should be facing each other.
13. Match the side seams and edges together.
Pin and sew with a ½ inch seam allowance around the entire top of the bag.
14. Turn the bag right side out through the 5 inch gap you left at the bottom of the lining.
15. Topstitch the hole closed.
16. Insert the Lining back into the back, iron the bag mouth and topstitch ½ inch from the edge.
MAKING THE STRAPS
17. Take your 5 inch x 17 inch pieces and iron ¼ inch edge on both ends.
18. Fold the strap in half lengthwise.
Iron flat to create a crease in the middle.
19. Open the strap, and fold each raw side to meet at the middle crease.  Iron Flat.
20. Open the fold and place 2 strips of the fusible fleece, placing one on each side of the crease.
21. Refold at the crease, hiding the strips of Fusible Fleece.
22. Iron as per instructions on your package of Fusible Fleece.
23. Refold at the crease to hide raw edges and sew on all sides at 1/8 inch.
24. Repeat steps 17-23 to make another strap.
25. Attach one end of each strap to the bag at 2 inches from each side and 2 inches down (this will meet cleanly with the box corners).
Choose which directions the handles will be facing at the point.
26. Sew the strap onto the bag using a box pattern and then sewing an “X” in the middle of the box for strength.
27. Do the same for all 4 sides.
You can find all these tutorials and other great articles in Homegrown, Parenting in the North (FACEBOOK, WEB, ISSUE).

 13 x 19 cardboard cake plates
 1. Cut your cardboard to 13 x 15 sheets. No worries, you’ll use the remnants afterward.
 2.Cut your sheet to three 13 x 5 rectangles.
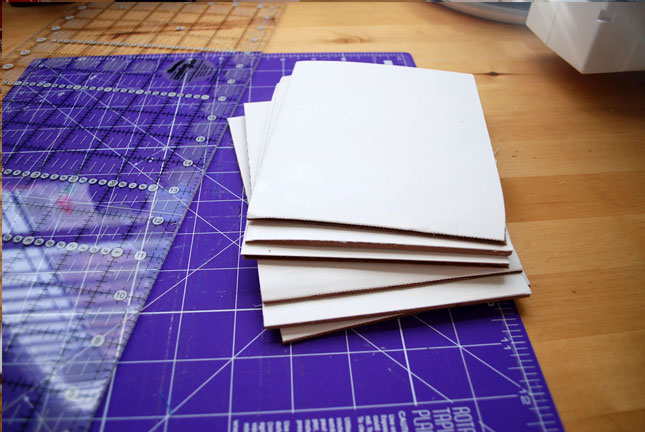 3. Cut your rectangles to 6.5 x 5 mini bolts. When done, you should have 18 mini bolts.
 4. Find a flat surface, and open up your fabric, but keep it’s mid-width fold. Bring your mini bolt to the left edge, and fold over half the length of the cardboard.
 5. Flip the fabric with the bolt upward, keeping the fabric taught against the bolt.


 2. Then cut them again in half (at 6.5 inches)
 3. Wrap your ribbon (or whatever your vice may be) and secure it by inserting a pin diagonally into the corrugation on the side.
 4. You can go an extra step and make them super fancy by placing the finished product into a glass cookie jar. I just keep mine filed in a plastic container.

